
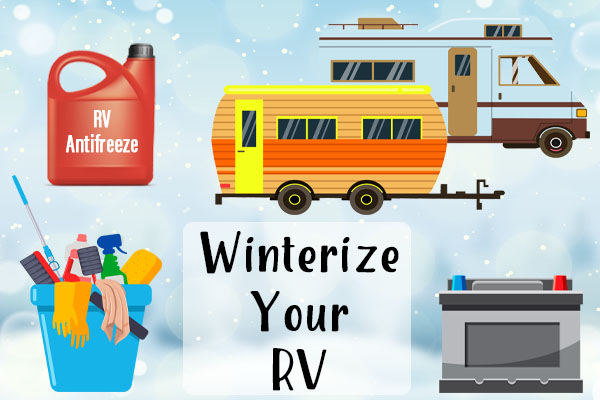
RV Winterization

RV Winterization Specials
Winterizing your RV is necessary and can be simple. If you don’t protect your RV plumbing system, any water remaining in the water lines or tanks can freeze, expand, and break fittings and lines. This can be a very costly mistake next spring. At Route 66 RVS we offer three RV Winterization Packages at a Special Low Price.

Winterizing is Necessary

You don’t want to find burst pipes come spring! Not only do you want to protect your RV plumbing, you should prepare your RVs Exterior, Interior, and Chassis Components for the winter months.
 Call
918.283.7558 or schedule an appointment on-line.
Call
918.283.7558 or schedule an appointment on-line.
For Do-it-Yourselfers
RV Winterization Guide
Winterizing your RV can be a simple process, if you just follow the steps below. There are three ways to winterize your rig.
BEST METHOD:
- Drain fresh water tank.
- Drain hot water heater.
- Dump and flush both black and gray water holding tanks, leaving the gray water valve open.
- Screw compressed air adapter into the fresh water inlet. The adapter is available at Route 66 RVs Parts Department.
- Apply compressed air, keeping the pressure less than 20lbs/sq inch.
- Open each faucet, one valve at a time, allowing the compressed air to force the water out of the line. Don’t forget the shower and toilet.
- Remove the drain plug from the hot water tank and allow the compressed air to blow out the remaining water. Reinstall drain plug.
- Remove the compressed air source and adapter.
- Close the water heater by-pass valve. (SEE SPECIAL WATER HEATER NOTE BELOW)
- Remove the water line that runs between the fresh water pump and the fresh water tank, where it joins the fresh water tank.
- Insert the end of the line into a gallon jug of RV antifreeze. ( NEVER-NEVER-NEVER USE AUTOMOTIVE ANTIFREEZE ! ).
- 12. Start the fresh water pump. It will run for a few moments, sucking antifreeze from the jug. It will stop as pressure in the system builds up.
- 13. Open each valve of each faucet, one at a time, until the red antifreeze appears, shut the faucet. Don’t forget the shower and toilet.
- 14. Remove the line from the jug of antifreeze and reattach to the fresh water tank.
- HINT: For a few dollars you can buy and install an adapter that will eliminate removing and reinstalling the fresh water line. It is a small three way valve that goes in the fresh water line, between the freshwater tank and the pump. You can easily pump antifreeze throughout he system by inserting the tube attached to the valve into a gallon of antifreeze, turning the valve and starting the pump. Simply turn the valve back to its original position and you are done.
- 15. Shut the gray water valve.
- 16. Pour a few cups of antifreeze down each drain and the toilet.
- 17. You’re done.
SECOND BEST METHOD – Blowing Out the Lines:
- 1. Drain fresh water tank.
- 2. Drain hot water heater.
- 3. Dump and flush both black and gray water holding tanks, leaving the gray water valve open.
- 4. Screw compressed air adapter into the fresh water inlet. The adapter is available at Route 66 RVs Parts Department.
- 5. Apply compressed air, keeping the pressure less than 20lbs/sq inch.
- 6. Open each faucet, one valve at a time, allowing the compressed air to force the water out of the line. Don’t forget the shower and toilet.
- 7. Remove the drain plug from the hot water tank and allow the compressed air to blow out the remaining water. Reinstall drain plug.
- 8. Remove the compressed air source and adapter.
- 9. Pour a few cups of antifreeze down each drain and toilet.
- 10. You’re done.
THIRD BEST METHOD – Fill the Lines with Antifreeze:
- Drain fresh water tank.
- Drain hot water heater, turn by-pass valve. (SEE SPECIAL WATER HEATER NOTE BELOW)
- Dump and flush both black and gray water holding tanks, leaving the gray water valve open.
- Remove the water line that runs between the fresh water pump and the fresh water tank, where it joins the fresh water tank.
- Insert the end of the line into a gallon jug of RV antifreeze. (NEVER-NEVER-NEVER USE AUTOMOTIVE ANTIFREEZE !!!!!!!).
- Start the fresh water pump. It will run for a few moments, sucking antifreeze from the jug. It will stop as pressure in the system builds up. (SEE SPECIAL WATER HEATER NOTE BELOW)
- Open each valve of each faucet, one at a time, until the red antifreeze appears, shut the faucet. Don’t forget the shower and toilet.
- Remove the line from the jug of antifreeze and reattach to the fresh water tank.
- HINT: For a few dollars you can buy and install an adapter that will eliminate removing and reinstalling the fresh water line. It is a small three way valve that goes in the fresh water line, between the freshwater tank and the pump. You can easily pump antifreeze throughout the system by inserting the tube attached to the valve into a gallon of antifreeze, turning the valve and starting the pump. Simply turn the valve back to its original position and you are done.
- Shut the gray water valve.
- Pour a few cups of antifreeze down each drain and the toilet.
- You’re done.
WATER HEATER NOTE:
One of the most important accessories you can add to your RV is a water heater by-pass. It is a simple device, one or two valves that isolates the tank from the rest of the water system. This is very important when you get ready to winterize. A water heater tank is normally about 7 gallons. Without the by-pass valve, you will have to fill that tank with seven gallons of RV antifreeze before you can pump it throughout the rest of the system. With a by-pass valve, you can save 7 gallons of RV antifreeze.
Installation is a pretty simple do it yourself project, or Route 66 RVs can install it for you. You will save the cost of the valve in just a few years with the value of the antifreeze you save.
Source: thecampingsource.com
Disclaimer note: This article is for reference only. It is not meant to be a definitive guide to winterizing your RV. Route 66 RVs, Inc cannot be held liable for any injury or damage resulting from the use of this article or any other information provided by the article’s source. Route 66 RVs, Inc strongly advises all readers to seek assistance from a professional RV service provider or dealer before attempting any service to your RV.